Friday, 5 April, 2019
This week I thought I’d go over something I see often overlooked on web projects, leading to a lot of extra work on the part of the front end team. Covering the basics of @font-face declarations can make for much simpler development and more natural inclusion in our CSS.
While web font services dominated the earlier years of support for real fonts, it seems to be more and more common to self-host font files—at least with the projects and teams I’ve been coming across. Between packaged-up design systems, more self-hosting licensing, and the desire for more control over hosting and use of CDNs, it’s far more likely you’ll end up needing to craft the @font-face rules yourself. While it may be tempting to take whatever Font Squirrel gives you, it’s worth it to take some time to understand how the pieces fit together so you can make your life a little easier down the line.
Set your standards
I know that the designers in our little community might be ready to skip down to the web font news and move on, but hang in there for a minute. There are two important things you can do that will help realize your design vision and make it less likely to break the way HTML (and therefore any sort of content editing system) naturally behaves.
First, with standard web fonts we get to choose what specific ones we want to be used with normal, bold, italic, and bold italic when those tags are used. If we want to use the 200 weight for body copy and a 500 weight for headlines, we can do that too. And if the ‘font-family’ name is set up right (a practice called ‘family grouping’), the default styles that browsers try to apply (like bold for the ‘’ tag or italic for ‘’) will just work and always reference the correct font rather than trying to synthesize a faux bold or oblique.
One way to think of the difference between @font-face rules and how you reference fonts in the rest of CSS is sort of push and pull: @font-face defines how you want to map a specific font file to default behaviors in the browser (the push). The other CSS rules you write are about pulling in a specific font-family and declaring which font you want to be used in a given scenario (i.e. bold italic). In other words: the pull.
Keep it in the family
This is where things are often missed with automatically generated @font-face files. Since you’re likely getting it generated with a number of font files, the system generating the code for you doesn’t always have the smarts to detect what you want to act as ‘normal’ or ‘bold’—so the font-family is often set up to be unique to each font file.
This forces a lot of finagling of extra CSS rules to remap the font selections, adding in loads of additional font-family definitions that have to be layered in order to produce the right results for different fonts in different contexts. It get’s tricky to make sure a sans-serif gets the right bold weight font when a tag is used and the serif used in headings and intro paragraphs gets the right one too. Setting up family grouping properly eliminates all of that.
Format formatting
There’s one other aspect of @font-face that we want to think about: file formats. Looking at our audience and browser support requirements will give us clues as to which ones we need to support, but it has at least gotten simpler in the past few years. When I first started writing about web typography, there were four very different font formats we had to support, and it made getting and managing web fonts fairly complicated. It’s gotten a little better, and will continue to get even easier still in the next year or two (at least for most of us). The format question used to impact font selection quite a bit too: not all font vendors would provide all of the formats. At least that’s much less an issue now.
So let’s start with file formats. In order to provide the broadest practical support and best performance for web fonts we need three different font file formats. Let’s take a look:
- WOFF (Web Open Font Format) - Technically a wrapper around TrueType or OpenType fonts, this file format enjoys the broadest support on the web, right around 96% according top caniuse.com (all modern browsers including IE 9+). This was the first to support OpenType features on the web, allowing us to access ligatures, alternate characters and numerals, and other features previously only available in print
- WOFF2 - The more recent evolution of the above, but with much better compression. File savings can be ~30% or more, though browser support is a little lower (88% on caniuse.com including IE 11)
- EOT (Embedded OpenType) - a Windows/IE-only format, but compatible all the way back to IE6
If you can, it’s well worth it to include all three versions in your @font-face declarations, though if you can forgo support for IE 8, you’re perfectly safe to drop EOT. Wherever possible though, be sure to include WOFF2 as the performance gains are really worth it.
Let’s look at the basic structure of a font-face rule with the most common attributes:
@font-face {
    font-family: [whatever you want to call it]
    src: [list of URLs in order of most desired format to least]
    font-weight: [normal | 100-900 | bold]
    font-style: [normal | italic]
}
There is certainly more that you can do, but these are the elements I want to focus on today as they have the broadest impact and the most commonly seen. I’ve deliberately left out some of those, but you can read more in depth on the W3C specification page or on the MDN documentation site. In particular, I’m skipping over the notion of referencing local fonts—that’s got its own whole set of issues and peculiarities, and is much more than should be tackled here. Likewise with font-display. I’ll get into that one when we cover font loading management.
-
SRC is pretty important, as this sets out the formats you are going to provide, and should list them in the order of most-desirable to least. By this I mean if our desired outcome is that the browser loads the WOFF2 version, the next best one is WOFF, and so on for other formats. Except EOT. Because IE beats to its own drum, we actually list EOT first to prevent it from downloading multiple font assets. Since other browsers don’t understand what an EOT is, they just ignore it and move on to the better format.
It’s important to remember that each @font-face rule is about a single font (i.e one width/weight/variant of Open Sans, and the different formats are still of that same instance. To bring them together and use them as a unified typeface, we look to ‘font-family’ for the way. -
FONT-FAMILY is where you specify how you want to reference it in your CSS, and this is how you can tie it all together. If you have 4 different fonts (regular, italic, bold, and bold italic) but want them to behave like a single typeface, it’s deceptively simple: start by giving them all the same font-family name! You have to pair that with one or two other things to make it complete, but that’s the starting point.
-
FONT-WEIGHT is how you specify if this particular font should act as the ‘normal’ weight or ‘bold’—meaning if you create a CSS rule that calls for this font-family with font-weight: normal you get the normal weight, or font-weight: bold you get the same typeface but in the bold weight.
-
FONT-STYLE works in the same manner, but for normal or italic. Here in both weight and style we see that we’re ‘pushing’ this specific font file as the solution for these specific weight and style defaults when that font-family is referenced. This is how we ensure that whenever you have two different typefaces (a serif and a sans-serif for example), in either case if you have a block of text that calls for one font-family or the other, if there is some text in the middle with a tag on it, that text sill render in the bold weight of the correct typeface.
Don’t forget—you can certainly have more weights specified in your @font-face rules, with the corresponding font-weight you want to reference. You can see an example in the demo.
Designing normal
What’s also important to grasp with all of this is that since we are specifying what font file is mapped to ‘normal’ or ‘bold’, if we choose to specify a lighter weight of the typeface as our ‘normal’ and for ‘bold’, that’s entirely within our control. By default, ‘normal’ is a synonym for ‘400’ weight, and ‘bold’ maps to ‘700’—but if we simply specify a different file (i.e. one that represents a 300 or 600 weight) and specify ‘normal’ or ‘bold’, that’s what will get used. See the CodePen demo for an example.
Family, grouped
Let’s take a look at what it might look like to use IBM’s Plex Sans in our example. Note that the font-family is the same for all four rules.
@font-face {
    font-family: 'Plex Sans';
    src: url('fonts/IBMPlexSans-Regular.eot');
    src: url('fonts/IBMPlexSans-Regular.eot?#iefix')
           format('embedded-opentype'),
         url('fonts/IBMPlexSans-Regular.woff2') format('woff2'),
         url('fonts/IBMPlexSans-Regular.woff') format('woff');
    font-weight: normal;
    font-style: normal;
}
@font-face {
    font-family: 'Plex Sans';
    src: url('fonts/IBMPlexSans-Bold.eot');
    src: url('fonts/IBMPlexSans-Bold.eot?#iefix')
           format('embedded-opentype'),
         url('fonts/IBMPlexSans-Bold.woff2') format('woff2'),
         url('fonts/IBMPlexSans-Bold.woff') format('woff');
    font-weight: bold;
    font-style: normal;
}
@font-face {
    font-family: 'Plex Sans';
    src: url('fonts/IBMPlexSans-Italic.eot');
    src: url('fonts/IBMPlexSans-Italic.eot?#iefix')
           format('embedded-opentype'),
         url('fonts/IBMPlexSans-Italic.woff2') format('woff2'),
         url('fonts/IBMPlexSans-Italic.woff') format('woff');
    font-weight: normal;
    font-style: italic;
}
@font-face {
    font-family: 'Plex Sans';
    src: url('fonts/IBMPlexSans-BoldItalic.eot');
    src: url('fonts/IBMPlexSans-BoldItalic.eot?#iefix')
           format('embedded-opentype'),
         url('fonts/IBMPlexSans-BoldItalic.woff2') format('woff2'),
         url('fonts/IBMPlexSans-BoldItalic.woff') format('woff');
    font-weight: bold;
    font-style: italic;
}
With that in place, all we have to do is specify the font-family and all the other default styles associated with bold and/or italic will just work. What’s more, if you look at the demo on CodePen you’ll see that if we do the same with Plex Serif, all we have to do is specify a different font-family and that works properly too.

The HTML and CSS is wonderfully simple:
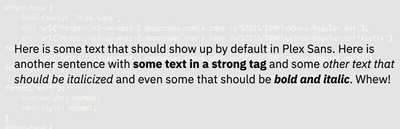
<p>Here is some text that should show up by default
in Plex Sans. Here is another sentence with <strong>some text in a
strong tag</strong> and some <em>other text that should be
italicized<p;/em> and even some that should be <strong><em>bold
and italic</em></strong>. Whew!</p>
p {
font-family: "Plex Sans", Helvetica, Arial, sans-serif;
}That’s it! No extra CSS required to get the and tags to just do their thing.
I hope this is useful, both for designers to understand how and what you can specify, and for developers to help make your lives easier when setting up self-hosting and fine-tuning the CSS that comes with whatever font package you receive.
We’ll build on this in upcoming issues when we dig into font loading management and variable fonts. But for now, have fun—and don’t be shy about asking questions. I’ve been hearing from one or two of you almost every week, and love the conversations and ideas that come from it.
Resources
- Example on CodePen
- W3C specification
- MDN Docs
- Paul Irish’s original ‘bulletproof @font-face syntax’
- Zach Leatherman’s characteristically in-depth response to the above